Total Pageviews

Tuesday, December 13, 2011

Ornaments MWL: Made With Love

  Welcome back! 

The holiday spirit is in full swing at my house, work and life in general!
 
     At this point my mind has been on overload from all the craft projects i've been doing. From holiday gifts to work lesson plans it's all about the CRAFTS! I can't complain though.... i'm crafting all day, coming up with new and fun ideas and getting paid for it. While it's not a bad gig, I still have a lot more to get finished before Christmas arrives.

    Now for this post's point: ornaments! MWL has a truthful meaning. The acronym  MWL stands for Made With Love as you could have gathered from the title of this post ( ha ha). Besides the fact that i'm on a budget this holiday I also love sentimental gifts. Even when I was young I always made corny, cute gifts of scrapbooks and poems for friends and family. 

     I also enjoy receiving personal, sentimental gifts. To this day my favorite gift I have received is from my girlfriends. A handmade quilt filled with pictures of myself and my friends from over the years. Every time I cuddle up with it I think of them and remember how lucky I am to call them not only my friends but truly my sisters.

     I decided to make ornaments as gifts and for my own tree. And this is how I did it...

You'll need:

  • Scrabble letters
  • newspaper
  • yarn or string
  • corks ( wine or champagne)
  • ribbon
  • hot glue
  • modge podge
( Alternative for modge podge: SAVE the $$$ and combine equal parts glue and water, easy as can be!) 


      The first ornament I made was the coaster ornament. I began by cutting a piece of newspaper and folding it accordion style until I had a folded strip. Once you  do that you can begin wrapping it into a tight circle so it looks like a coaster. Be sure to slip a piece of yarn or ribbon through the newspaper once you've finished rolling it into a circle. This will be the way your ornament will hang. You can make these big or small they just have to be big enough to hold your scrabble word. I chose to do LOVE. 


     Once the circle is complete, secure with hot glue. Soon after, apply your modge podge or my alternative solution. This will allow the newspaper to stay put and it will dry clear. Once the modge podge coat has dried, hot glue the scrabble letters to it. 


Wrap this ornament in a pretty box and decorate a brown paper bag to wrap it in and give it to someone special!


        The next one I made is the cork ornament. As stated above, you can use a wine or champagne cork. For mine I used a champagne cork because that is what I had in my house. This ornament is very simple and cute.

     Take the selected scrabble tiles you wish to use. I chose Noel. Hot glue each piece onto a side of the cork. Press firmly and allow to dry 3-5 seconds to ensure that is has stuck. insert a tack or metal wire to the top of the cork. Use yarn or ribbon to tie to the top in a circle. Hang on a tree or use for garland decorations!


Another ornament I made ( use felt, newspaper , ribbon or burlap for the back) :


SO easy... glue on scrabble tiles to ribbon, punch a hole at the top and string yarn through to hang. Almost instant ornament!

Happy Crafting!

Wednesday, December 7, 2011

DIY Yarn Ball Ornaments


Happy Holidays!

   Like many of you, I got my tree this past weekend! The past couple weeks I have been searching the web for cute but easy DIY ornaments. I came across a few good ones but decided to put my own twist on them.

   Outside on our balcony we strung  twisted stick ball lights I got on sale a few weeks ago at Target. They are perfect for the cold months and add a touch of earthiness to our lackluster patch of grass at our apartment complex. I got the idea to do these yarn ball lights for the tree because well, I have extra yarn around.

   I wanted something cheap that didn't look cheap! These ornaments/ light covers are perfect for garland, tree lights, strung on a string across a mantle or to placed in a bowl on  display!

What you'll need:

  • Any colored string of choice
  • white glue ( elmers)
  • water
  • paint brush
  • balloons
  • a bowl for mixing    

    First you'll need to blow up the balloons to about the size of a clementine or small apple. You can do larger or smaller depending on how big you want the ball to be.

    I blew up about 7-8 balloons but it depends on what you are making. You may need more or less! I'd say 5-6 are good for a bowl display, 10-11 for a garland or if you are stringing them across something.

    Next, put glue into a bowl and mix in water to thin it out. I used an entire container of white glue and added 1/2 cup of water. I had left over "modge podge" so I just dumped it back into the original glue container for another project.

    After the mixture is ready take your yarn and use a little of the glue and water mixture to adhere the yarn to the balloon. Begin wrapping in one direction and then go the opposite way. Add a layer of glue and continue wrapping until you get the effect you want. I left some space to create a “balled up” look.


    Lastly, apply a layer of the glue mixture that covers all the yarn. The glue mixture will harden overnight and create a stiff yarn ball. After 14-16 hours the yarn ball will be completely dry. You should then pop the balloon inside of the yarn ball. Discard the popped balloon.


     Now you are ready to decorate! Hang them, string them or place these balls in a beautiful, festive bowl.


Happy Crafting!

Monday, November 28, 2011

DIY Xmas Decoration: Book Tree

Today's post is an easy and FREE way to add some seasonal cheer to your home! 

**All you need is an old paperback book you don't want anymore or a used magazine


First, take off the cover of your book or magazine as well as the back. Break the binding and begin folding the first page top right to center.


Next, fold again bringing the entire page to the center. Fold up bottom flap so there is a clean bottom.


Continue folding the desired amount. I skipped some pages towards the end and tore out 10-15. Using all makes a fuller tree but it didn't make too much of a difference. 

The end result:


Display your tree(s) on a shelf, table or anywhere else you can think of. You can even string fabric or twine through it and hang tiny ones as garland!

Happy crafting!

xo- Christina

Tuesday, November 22, 2011

Gifts: Scrabble Coasters

'Tis the season!

If you are on a budget but want to give meaningful, fun gifts then look for further! These scrabble coasters are just the first of many DIY gifts I will be making for the upcoming holiday. They are easy yet personal gifts for everyone to enjoy. This gift is a winner whether you've got a teen, spouse, cousin or co-worker that you need to check out your list!

Supplies needed:
    hot glue
    scrabble tiles ( i usually have enough to make 4 coasters for a set and 16 tiles for each one)
    Felt, cork board ( optional)

I chose a theme for my coasters. My boyfriend is an NFL nut so therefore I chose "Game day" which included beer, football and games. 

First, begin by choosing words. They can be grouped as a theme, random or both! Once you decide, sort the scrabble letters and set aside while you prepare your work space.


** Don't have a scrabble board or hate to use your beloved game? Odds are you can find scrabble pieces at any thrift shop or local goodwill. No luck with that? The internet has sites with CHEAP scrabble pieces. Etsy, amazon and ebay are just a few sites with tiles.

Next, use hot glue and start gluing the pieces together. Make sure that the pieces are secure and even. Press down on a hard surface to make sure it will lay nicely when a cup is placed on it.

TIP: another way to do this is to glue the pieces to a piece of felt or cork board. I didn't have these items so I just attached each tile but if you do, go for it!


After the hot glue has dried, turn the coaster over and apply more glue in between each crease. This ensures that it is secure. Adding a backing like felt or cork will allow the coaster to last longer but it is not necessary. 
The finished product:


Happy crafting!


Check back for more DIY gifts soon!

Monday, November 14, 2011

DIY Party Banners

Last friday was 11.11.11. A very special day for more than just wishing but also my boyfriend's 25th birthday! I decided to make a cute banner for him displaying the words "Happy Birthday". This is a super easy diy project that you can do in about 25 minutes. The possibilities are endless for decorating the banner and you can use it for any occasion!


Why buy a generic  banner when you can make one to suit the parties needs and save money! You can use practically any paper or material that allows for cutting.

These banners are great for :

  • Holidays
  • Birthday parties
  • Religious events
  • Bridal / baby showers
  • Festivals
Also create name banners for a child's bedroom or play area. These banners give a personal touch to any space

Here is how I made Jeff's birthday banner:

What I used:

  • Paper ( white and blue).3-4 pieces each . They were left over from another project I did at work.
  • A glue stick
  • ruler
  • red marker
  • black yarn
  • scissors
  • sharpie marker
  • hole puncher
You can alter any of the materials as needed for your own banner


First begin by making a triangle out of any materials you are using ( i.e paper). Cut two different sizes so one can frame the other for a cleaner look. Use the first two triangles as templates to trace the rest. I needed to make 13 sets for "Happy Birthday".


After cutting and tracing all the triangles use a glue stick to combine the sets. After this you can use a marker, glitter, paint or whatever you want to write out the letters on each triangle. I also outlined the smaller triangle with a sharpie for definition.


Once you've created all the triangles with their assigned letter take a piece of yarn, string, etc. and tie a knot at one end. Punch two holes on each end of the triangle and string the letters on the string.
After you string all the letters on be sure to tie another knot at the opposite end of the original knot to secure the letters on the banner.

Finish the banner off with glitter, stickers or any other material you have!


Enjoy! And save your banner for years to come.

Thursday, November 3, 2011

Holidaze

It's November!

Time for turkey, hot cocoa and raking of the leaves. For many this time means preparing for the holidays, especially December holidays. They are right around the corner and whether you celebrate Christmas, Hanukkah or Kwanzaa there is always some kind of anxiety around holiday season. Many consider this good anxiety ( me!) but for some is is a nightmare.

I've thought of a few easy tips to get you through the season. And I will also be posting a lot of DIY gifts, treats, decorations and other fun holiday items!


To make this holiday season fun and simple try this:

1. Make a list. I am a huge list maker and just having things in order will make your life easier. Naming off people on your life gives you space to play with ideas or can be a reminder to send out a mass e-mail explaining you will give nor want to receive any gifts ;-)

2. Pick a Time.  Shopping can be crazy during the holidays. Pick a time that is "off" hours if you can manage. Weekends and after 5 are the busiest times to shop. If you can find a little lunch break time or an hour in the morning it will be much less stressful for you!

3. Designate jobs. If the family doesn't want to help ( or wants to but isn't sure what to do) then make a game out of designating jobs. See who can get their own job done fastest if competition drives your kids, wife or husband. Try a chart or roster with each person's name and what they can do to help. Maybe it is collecting DIY materials like acorns, pine cones or stones. Explain that any little bit helps and that is one thing off your list.

4. Save Money. Making gifts is meaningful and cost-effective. There are so many great sites that show you step-by-step how to make a gorgeous decorative vase or pretty votive holders. Try Pinterest.com for ideas and links to great crafts and gift ideas. Even if you arent the crafty type you can always bake or put together a fun "treat" basket for family and friends. Do you have a sweet lover? Make brownies, cookies and dip pretzels in chocolate for an easy, fast gift! Peppermint bark is also super easy but tastes and looks expensive.

Image Courtesy of http://sidebysideblog.blogspot.com/2009_10_01_archive.html

Tuesday, October 25, 2011

In Retrospect & other YOLO types of things

This post is all about YOLO. You Only Live Once is an acronym that my friends and I like to use a lot: cliche? Yes, a cliche is defined as something over-used or over-said but reminding ourselves that we only live once hopefully ensures a life of adventure and pursuit. The pursuit of travels, art, challenges, love... anything you may desire.

For me, living life is about doing what makes me happy. Sitting home 3 nights in a row watching reality tv and junk food, sure! Even though for me this isn't normal, every once in a while I remind myself that it's okay. But really, spending time with good friends and family is ideal. Although I love where I live, I am a little further than I'd like to be from all my loved ones. My boyfriend and I are building a great home for ourselves and an exciting life but nothing compares to having true support down the street.


Back to yolo and the reasons why I see life as a gift is my dad. He passed away 3 years ago from kidney disease and failure. Many of you out there have gone through similar losses and it is an indescribable pain. My dad taught me to cherish each day because it is the only one that you are guaraneteed. He was right, after years of dialysis and painful illnesses that came along with kidney failure he lost his battle. Growing up we did so much as a family. Boating, trips, family days all filled with laughter, sarcasm, jokes and best of all love!

After my dad passed I wanted to live life my way. I wanted to everything I planned to do before he died and make him proud. He always believed in my writing abilities and my "smarts". Even though I wouldn't say I was the smartest in class I do believe I have creativity and have always loved art.

I wanted to visit Europe. So last year I backpacked with a friend through 7 countries!
I love going to festivals and art shows. Even if it's alone or with one other person, i go!
I wanted to go skydiving. I jumped 14,000 feet this year with my boyfriend!


The bucket list i've created is far from being completed. But I am 24 and hopefully have some time to complete it. But if something happened and I died tomorrow I can happily say I have lived life with my arms open and taken risks. I have taken jobs that weren't go great but I knew they would lead to something better. If you get your foot in the door, you can open a lot more windows.

Find what makes you happy.

Monday, October 17, 2011

Plain Be Gone: Entry way style

Moving into our new apartment has been great. Aside from the occasional dirty dish (cough, cough my pet peeve) or a noisy neighbor, it has been awesome. Like most guys, my boyfriend gives me mostly full control of decorating. He loves all my ideas but sometimes thinks they are funny. Coffee filter wreath? Well, he actually thought it looked cool and my mom thought I bought the wreath at a store! 

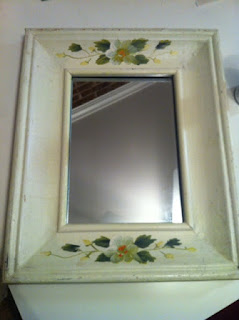
My latest "patients"were a few good finds at my local thrift shops. I found some great paints, brushes and even some great craft tools. I also scooped up a nice mirror that I thought would be great in my entry way. For months I have collected ideas from other blogs and magazines to serve the purpose of creating the perfect home that reflects mine and my boyfriend's taste. We like simple and unique pieces and don't want the clutter of too many things!

Enough blabbing from me, here is what I did for my plain entry way. 


Mirror: Before

Use gold ( or any color) spray paint to transform this mirror to match any decor. I taped some newspaper over the mirror to save myself the task of scraping off any spray paint afterwards. 

Spray about 4 inches away from the mirror and frame. Do one coat and let dry for a couple minutes. The flower design was painted on so this mirror needed two coats of the gold.


Mirror: After


This project is an easy way to transform something from a thrift shop that is maybe not your style to something that fits your decor perfect!

Simple DIY art:
I wouldn't say that I am a painting prodigy but I do love to try out different ideas for simple art!  I found some great paints at a local thrift shop along with brushes and tools. The art canvas's were on sale at Michael's for $3 each. 

Supplies: 


You will also need tape. I used basic scotch tape.

Tape off strips on the canvas in a zig-zag direction. Imagine when you peel it the paint will create lines on the canvas.

Taping makes it easy for anyone to tape, paint and peel with a no-fuss, mess-up free piece of art!

Take the paint and put a quarter size amount into a bowl. Stroke your brush back and forth on the canvas with any color desired. If using two colors, place them in different bowls. Paint each taped off section the same color or alternate sections of color.


Your piece may look similar to this. 


After you have finished painting all the sections, let your painting(s) dry for atleast 4-5 hours before peeling off tape.

The final product:

After the paint fully dried and I tore off the tape this is my final product!  (above)

The new entry way wall:

Friday, October 14, 2011

Coffee Filter Wreath

I know i'm not the first but this project is so cool! And what is more green than saving some money and making your own pretty wreath? Who would have thought natural coffee filters could be so elegant and fun?! So i've decided to finally try this decor craft out and this is how it all went down...

What you'll need:

Basic glue gun

Styrofoam wreath


Natural Coffee Filters ( About one whole pack used for my wreath)
Now that you have all your supplies you can begin! Start by crinkling the bottom of a single filter and place a dollop of hot glue on the inner ring of the styrofoam ring.


Yours may look a bit like this:

Continue around each layer. The side view may look like this:

Continue all the way out to the edge filling in any open spaces along the way.


The finished product below!

You can either hang this wreath or lean it on a shelf, windowsill or any other place you can think of! Have fun with this and don't think too much about placement, size and crinkle. You can always fill in spots later.


Tuesday, October 11, 2011

Beauty and Brains


Don't you ever wonder what is in that 'mineral' powder that you are putting all over your delicate, sensitive face? Even if you don't have sensitive skin there are things that are in all those beauty products that aren't certified organic that are bad for those rosy reds and soft skin. Wouldn't it be nice to know what you are using is 100% natural and safe for your skin and body? Hopefully you are saying " YES, yes yes!"

Many cosmetics and beauty companies are jumping on the organic band wagon and claiming to be organic but really are still adding things into their products that are  NOT organic.

As a consumer, be aware of the bad things that can be in your make-up and other beauty products. Some bad and harmful chemicals can be added into these things to preserve them on the shelf. Here are a few additives to avoid when shopping for these products: Formaldehyde, parabens, phthalates, petroleum, toluene.

Also be aware that stuff in make-up like talc, mercury and synthetic colors are all harmful and should be avoided! Some of the certified organic stuff may be a few dollars more BUT you are getting the satisfaction that it is good for your skin and body and that is worth any amount over harming it with chemicals.

Here are some websites for beauty products that are certified organic and green-
www.aveda.com
www.burtsbees.com ( everythings great but check out there awesome hair products!)
www.sparitual.com ( no chemicals in these nail polishes and removers!)
www.juicybeauty.com
www.lavera.com
www.eccobella.com
www.jason-natural.com
 www.aubreyorganics.com ( my personal favorite)

* Thanks to my trusty fan and best friend Gina, I have added some new things to this page about eco tools... enjoy
Makeup brushes can be hard to come by that are eco- friendly and good quality. Some brushes are very expensive but surprisingly eco- brushes are affordable, do the same as those pricey ones and are good for the environment!

Here are some brands to check out :
eco tools found on www.treehugger.com and most drugstores like rite aid. They are great and made from sustainable and eco-friendly recycled materials! $14 for a pack of 5-7 brushes/tools.
eco nvey tools. Made from recycled materials as well, more expensive but prices vary.
www.blisstree.com also sells eco tools and offers articles on the positive effects of using recycled tools!


Back to Basics

Welcome back! So, i've decided to convert my blog and my blogsite into one location. All of www.gogreengal.synthasite.com information will be transferred to my blog and all future information will be posted here! My next couple posts here will be gogreengal's info. revamped. Enjoy!

The 3 R's of living green are very important with keeping the Green tradition alive and not just a fad but part of your permanent, everyday life.

REDUCE the amount of things you waste, buy,amount of packaging things come in etc.
REUSE grocery bags, shoe boxes, old clothing etc.
RECYCLE cans, plastics, aluminum, rechargable batteries etc.

Living green would mean eating mostly organic, using products with little to no chemicals, living and using the 3 R's daily and finding things in your everyday life that are natural, unprocessed and safe for the planet!

Of course the love of certain things is always hard to give up and these things can be kept. Take baby steps and replace things you have now with products that are certified organic. Going green does not mean that you should go out and buy all new certified organic food, cosmetics and clothes... no, no, no! An easy way to start going green would be to go out and get those organic and natural things when you run out.  Some easy things to start with would be beauty products ( lotions, cosmetics etc) , produce ( fruits & veggies), and anything you run out on first. In today's world you can find much more things that are offered as certified organic.

** Watch out for fake organic products. Companies are not always 100% sincere with how they use the word 'organic' . So, make sure it says CERTIFIED organic or else you might end up paying way more money for those products. - Picture below ( USDA) is what will be on REAL organic products.

Sources that helped me out:
Green Chic by Christie Matheson
http://notmadeofmoney.com/blog/2007/04/10-things-you-can-re-use-to-save-money.html
http://www.pca.state.mn.us/oea/reduce/index.cfm

Wednesday, October 5, 2011

RRR. bag lady.

Birthday gifts are always fun. They're even BETTER when a friend knows you so well they hit it out of the "park". My lunch bag is functionally adorable and it was a gift from my friend, kerry ( thanks, ker!). I seriously love this little 9x7 bag and the best part is it is recycled and cute! GG2G is a company that makes awesome bags made from recycled and reused materials. The best part is all their products are made in the USA. From clutches to purses there is something for everyone. My lunch bag was purchased at a store in CT and you can find a store near you listed on their website.

Monday, September 26, 2011

Euro Inspiration

Starting a new blog is always fun! I love the community that bloggers have made and it is amazing how sharing information  can create such positive energy. I had the pleasure and blessings to backpack through Europe last winter ( January) for a month. It was an experience of a lifetime ( cliche but true). I was inspired by the fashion, food and way of life- especially in Paris and Barcelona. The people their have an effortless way of putting together things that are unexpectedly chic! 


I plan to go back within the next couple years but until then I want to share some of the photos I took and the highlights from my trip. 

My Euro-trip route:

Started in Rome ( Roma)
   -----> *Florence*(Firenze) ----->*Venice*(Venezia)----->
*Munich, Germany*-----> *Paris,France* ----->*Barcelona, Spain*----->*Nice,France*----->back to Roma!

I got so many of my ideas for art, decor, jewelry and crafts from Europe.


Old to New

I have found that my grandmother's vintage jewelry is an amazing find. I decided to start little projects  after collecting her costume jewelry hand-me-downs over the years. I want to give these pieces new life! 

She has the most eclectic collection of stunners from pins and brooches to sparkly earrings. I've created some unique pieces that I love dearly. I think the next step will be to create an etsy shop once all of my creations are complete. I can't part with some of the special pieces but I had so much that I want to share these "gems". 

Top row: Re-purposed pins made into rings

Bottom row: Re-purposed earrings and pin made into rings

More pictures and info. to come soon!