I'm very excited to share my first post here for BYOP- Bring Your Own Party event planning. When they came to me and asked if I wanted to collaborate I was both honored and excited to work together. BYOP not only plans your event but will cater, manage and decorate your space. The possibilities are endless with their idea of "If you dream it we can design it".
http://www.bringyoparty.com/
D.I.Y Eco-Friendly
Egg Dye
Spring
cleaning, brighter colors and yummy candy galore (mmm jelly beans!) … a few
sure signs that spring is here! Whether you have children or not it is still
fun to take part in the ritual of egg dying. Instead of using the typical store
bought colors I wanted to share some easy recipes for unique and Eco-friendly
dyes. I’m bringing to you D.I.Y colors made from products you probably already
have at home!
This
is a fun project you can do in a short period of time because the D.I.Y colors
require little prep time. You will approach this just like you would any egg
dying project… boil the eggs, let them cool and mix the colors with vinegar.
Now, let’s get into the first fun part: making the colors!
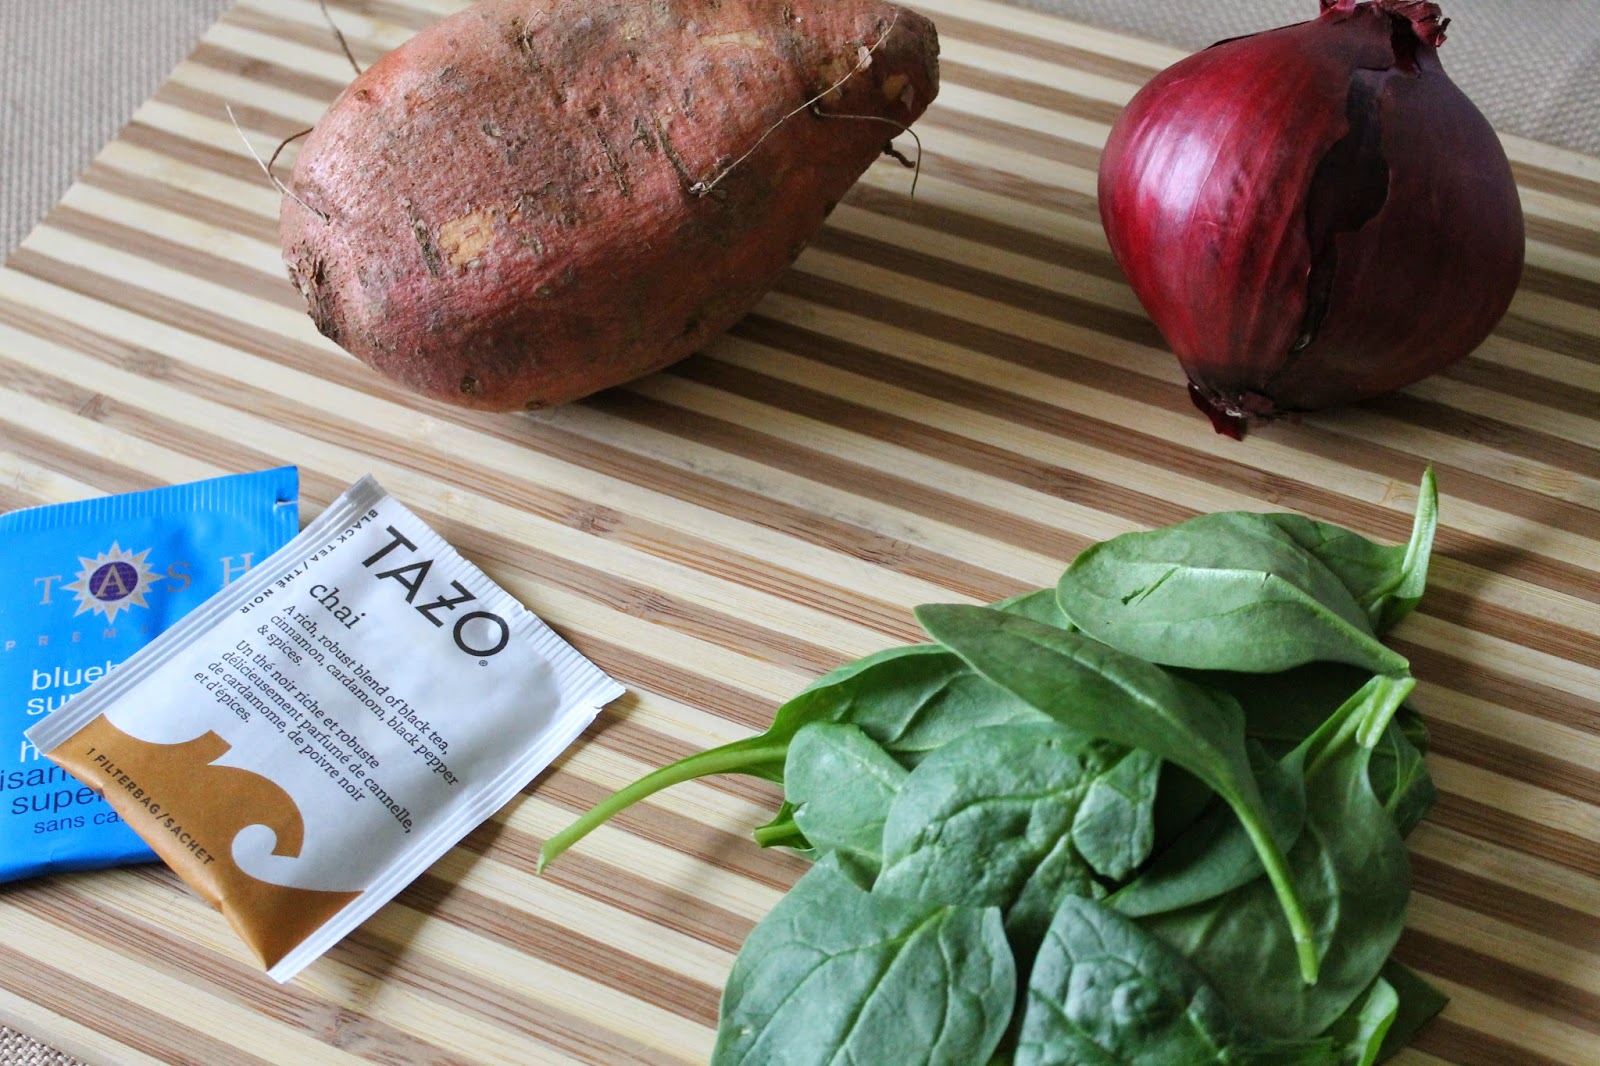
Materials Needed:
-
Medium to
large pot to boil 12 eggs
-
Permanent
markers or a white crayon for decorating
-
Washi (
paper tape) or masking tape if you want to create lines
-
Bowls to dye
eggs in
-
Egg carton
to dry dyed eggs
-
Tea bags (
blueberry, chai, raspberry) of your choice
-
White
vinegar
- 12 white
eggs (or more if you desire)
- Spinach
- Coffee
-
Red onion
-
Sweet potato
BOILING THE
EGGS
Once you have your materials
gathered you can begin to boil your eggs.
1.
Put all your
eggs in a pot and fill it with water.
2.
Once they
are covered bring the water to a boil.
3.
Once the
water is boiling, cook for 7 minutes.
4.
Put the eggs
in a bowl of cold water and refrigerate for 15-20 minutes or until cool.
5.
Dry the eggs
completely before decorating.
Decorating
& Dying
Now it’s time to start
decorating! If you are planning to decorate with the markers, wait until the
eggs are dyed. If you are planning to use the white crayon, decorate now before
you dye. This creates a really cool look where the design is resistance to the
dye so it sticks out even when colored.
D.I.Y
DYE MIXTURES AND MEASUREMENTS:
Mix the following ingredients with 3/4 cup water and 3 tablespoons of vinegar unless otherwise specified below.
- Bluish/greyish tinted dye: Blueberry Tea bags
- Orange/ brownish dye: Sweet potato ( boiled and strained for water)/ orange tea
- Greenish/ brownish/ yellowish dye: Spinach ( 1 cup mixed with 1/2 cup water heated then strained) plus 1/2 cup coffee
- Brown:Coffee ( 1 cup strong coffee)
- Light brown: Chai tea bag
- Deep red/ purple/blue: Fresh or frozen blueberries
The longer you leave the egg in the dye the deeper the color
gets. I left my eggs in for 3-4 minutes and did about 3 at a time in separate
ramekins so I could decorate as I went. This is meant to be a fun project so
definitely add colors, mix dyes and see what you get! I really liked trying to
do the ombre (color fades from light to dark or vice versa) to show the
gradient of color.
The Finished Product
Allow eggs to dry for at least 15 minutes in the egg carton
before refrigerating. Once they are done you can display them at a festive spring
gathering or take them in your lunch as a fun reminder of this time of year.
Eggs that are colorful and decorative are much prettier than bland, regular
hard boiled eggs!
The
fun part about making your own colors are you can customize them to your
liking. Want a brighter red? Add some extra berries. Want a more yellowy-
brown? Add a touch more of the brewed coffee. It is fun to see what
combinations can be used from mixing and matching.
Don’t forget if you want to decorate
with the markers after you have dyed the eggs make sure they are completely dry
(about 30 minutes after taking them out of the dye)
I had to share my snack while dying eggs :-)
I hope you’ve enjoyed this post
and I look forward to sharing more fun projects soon!
Xo-
Christina @ CT Green Gal